
I've been busy this weekend on a project for Boo - inspired by the Great British Sewing Bee upcycling challenge, I've upcycled one of Daddy's old shirts into a Doctor's coat! It was a pretty simple transformation so I thought I'd post a quick tutorial to show you all how I did it - after all, sharing is caring. Why not have a go yourself and make one for the Junior Doctor in your life? Or adapt it into a lab coat for your budding scientist?

To make this coat you will need:
A man's plain white shirt (mine was a 16.5 inch collar)
Approx 15cm square of red cotton fabric
Approx 10cm square of iron-on interfacing or Bondaweb
Red bias binding
Red cotton / embroidery thread for the name badge
plus for sizing it's handy to have a child's shirt in the size you need

First up, I got Boo to try the shirt on so I could work out the desired length. If your small person is too wriggly for this, just use a tape measure to measure from their neck down. I wanted plenty of wear in mine, so made it as long as possible without swamping her.
When you've worked out the length, add a 2cm seam allowance then measure and cut across at the appropriate point. I used my rotary cutter and mat for this, but tailor's chalk, a ruler and scissors would do just as well.
Don't throw out any offcuts! You might need them later.

If there's a pocket, unpick it with a seam ripper (ours had a nice stain on, after being washed with a train ticket, hence it being "upcycled"!)

Next, I used one of Boo's PJ tops to work out how wide I wanted the bodice and how deep the sleeves needed to be. I chose one that's on the big side so it'll fit for a while.
Button up the shirt, turn it inside out, and lay the child's shirt on top, matching the collar / shoulder seams. Then mark where you want the seam on the white shirt with chalk, up to the armpit of the child's top so the sleeves will be the right depth. (You could probably do this stage with proper body measurements, but I'm lazy and this seemed easier!)


Then pin and sew the seam with a long (tacking) stitch.

Next, mark and sew the sleeves. First, cut the cuffs off the shirt and cut along the seam of the sleeve up to the armpit, so the fabric will sit flat. Smooth it all out, and mark a line from the top of the side seam you've just tacked, parallel with the top of the sleeve. Don't worry about sleeve length yet, we'll sort that out later. Pin and sew with a long stitch, as with the side seam.
Again, if you wanted to be fancy you could probably re-cut the arm holes and re-set the sleeves here, but that sounded complicated and I didn't think Boo would appreciate the difference!

After checking the fit on your model (if they are available and compliant - I had the former, the latter took some patience!) sew over the side and arm seams with a standard stitch length (I set it to 2.2)

Press the seams and cut away the excess fabric, leaving a 1cm seam allowance.

You might want to reinforce the armpit seams with some extra stitching for strength.

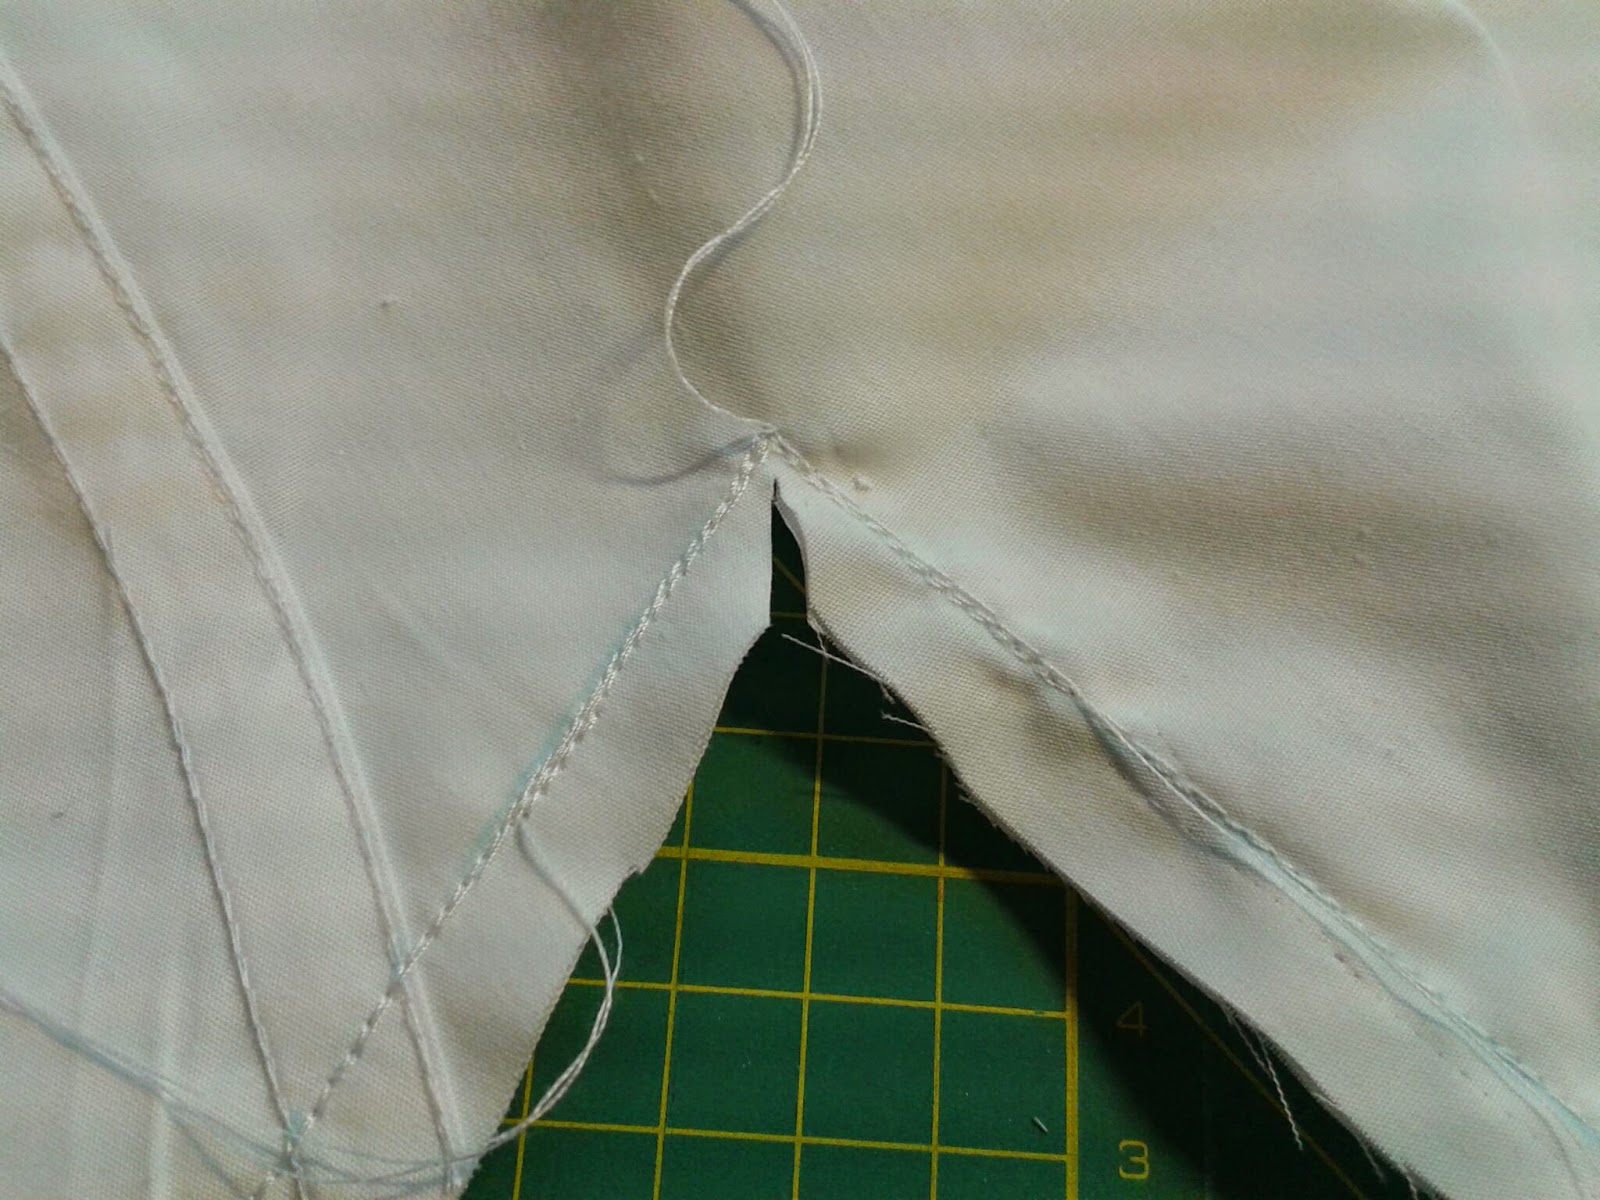
Then cut into the corner of the armpit seam so it sits flat when turned out. At this point i also finished the seam with an overlocking stitch. If your machine doesn't do this, just stitch along the edge of the seam allowance with a zig zag stitch to stop it fraying. Press the seams again.
Check out my super neat stitching, ha ha...

Turn your coat the right side out and give it another press.

Now hem the bottom and the sleeves with a 1cm double hem (turn up 1cm and press, turn up another cm and press again, so the raw edge is encased, stitch to secure and press). I did a double row of stitching to make it look super neat, but one will do.

I left the sleeves quite long, so we can roll them up but there will be plenty of room to grow.

Pockets next! Never one to waste a ready made seam, I used the shirt tails I cut off at the beginning to make the pockets. You might need to use some other white cotton if your offcuts aren't big enough. Or use a contrasting colour if you want to brighten it up a bit.
Work out how big you want your pockets to be - mine are 15cm x 11cm. Add 1cm seam allowance each side, plus 1cm at the bottom if you haven't used the shirt tails' existing seam.

I used bias binding to finish the tops of my pockets - if you haven't got any, just add 2cm seam allowance and make a double hem. You could always sew on some ribbon or ric rac trim to add colour instead.
If you are using bias, cut a couple of lengths a bit bigger than the width of the pockets. Open up one side of the bias, pin to the top of the pocket (right sides together) and sew along the opened fold of the bias.

Turn up along the seam you've just done, and fold the bias in half so it encases the raw edges. Sew a row of top stitching to secure it in place.

Cut the excess bias off and press.

Zig zag or overlock along the remaining raw edges of the pocket. If you don't already have a finished seam at the bottom, turn up 1cm and press. Then turn in and press 1cm on each side.

Pin and sew your pockets to your coat. I stitched the seam twice for strength and added some parallel stitching at the bottom for interest.

Nearly done! Just the decoration to do now. For the cross, I made a template out of bias first so I could test the size and shape.


I then used the template to draw the shape on some Bondaweb, then ironed it onto the red cotton fabric. If you haven't got Bondaweb you can use iron on interfacing instead. But I really recommend getting some Bondaweb, it's magical stuff!
(You could cut the shape straight out of the red fabric, but it will be more difficult to sew this on straight - I'd use a stiffer fabric instead in this case, felt would be ideal.)

Cut around the outline, remove the paper backing and iron the shape onto your coat (or pin it if using interfacing).

Sew around your shape to secure it. I went around it twice for a shabby chic effect. I absolutely didn't go wrong the first time so had to go around it again to make it look deliberate. Nope, that didn't happen and it was definitely a conscious design choice. (Phew, I think I got away with that...)

And finally, the name badge. I used freehand machine embroidery to write the name - for this you'll need an embroidery hoop and a machine that lets you drop the feed dog. Put some white cotton fabric in your embroidery hoop and draw the name, going over each letter several times. There are lots of tutorials online if you want to give this a try.
Alternatively, cut a piece of iron on interfacing to the size you want your badge to be, and write your name onto the shiny glue side (you can get special vanishing ink pens for this, but a biro works too). Iron this onto one of your white cotton offcuts, thread up some red embroidery floss and embroider your name badge.
Cut your name badge to size, then cut out a piece of red cotton slightly larger than the name badge. Stitch the name badge onto the red cotton, then stitch the whole thing onto your coat.

And you're done! Here's Boo trying it out for size. I think she likes it.

I'd love to know if anyone tries this out - I've never written a tutorial before, so any feedback on the instructions would be greatly appreciated too.
You can contact me on here, or on my Facebook page www.facebook.com/elliebooandbeans, or on Twitter @ellieboobeans
Looks lile a great tutorial. I havent Tried it yet but thanks.
ReplyDelete